
Picture this: the sun is shining, friends and family are gathered around, and the tantalizing aroma of sizzling burgers fills the air. There’s no denying that a backyard barbecue is a quintessential summer experience. But before you fire up your grill for another mouthwatering cookout, there’s one crucial step you can’t afford to overlook – cleaning your BBQ grill.
Cleaning your grill not only ensures optimal flavor and food safety but also extends its lifespan. A sparkling clean grill not only looks impressive but also enhances cooking performance by preventing flare-ups and maintaining even heat distribution. So grab those cleaning supplies and roll up your sleeves! In this blog post, we’ll guide you through 10 easy steps to achieve a spotless BBQ grill that will have everyone asking for seconds.

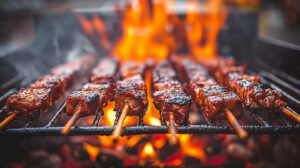
BBQ
Step 1: Preparing the Grill for Cleaning
Before diving into the task of cleaning your BBQ grill, it’s important to properly prepare it. This step will make the cleaning process much smoother and more effective. So, let’s get started!
First, make sure the grill is completely cool. Trying to clean a hot grill can be not only dangerous but also less efficient as grease and grime tend to stick when heat is involved.
Next, remove any leftover food or debris from the grates using a stiff brush. This will help prevent any unwanted flavors from transferring to your next meal.
After that, detach removable parts such as burner covers and flavorizer bars if possible. This will allow you better access during cleaning and ensure that every nook and cranny gets thoroughly cleaned.
Now it’s time to disconnect the gas supply or remove any charcoal residue if you have a charcoal grill. Safety should always come first when dealing with fuel sources.
Give the exterior of your grill a quick wipe down with warm soapy water or an appropriate cleaner. Removing dust and dirt from the outside will not only make your grill look sparkling clean but also help maintain its longevity.
By following these simple steps in preparing your BBQ grill for cleaning, you’ll set yourself up for success in achieving that sparkling clean result we all desire!
Step 2: Gathering Supplies and Tools
To tackle the task of cleaning your BBQ grill, it’s essential to gather all the necessary supplies and tools beforehand. This will make the process smoother and more efficient, ensuring a sparkling clean grill at the end.
You’ll need a bucket or large container filled with hot water and mild soap. This will be used for soaking the grates later on. Additionally, grab a wire brush with sturdy bristles that can effectively remove stubborn debris from the grates.
Next, don’t forget about protective gear for yourself! Put on some rubber gloves to shield your hands from dirt and grease during the cleaning process.
Now let’s move on to some cleaning agents. You’ll want to have an all-purpose cleaner or degreaser handy for tackling any built-up grease or stains on the exterior of your grill. A microfiber cloth works well for wiping down surfaces.
Consider having some aluminum foil or heavy-duty plastic bags available if you plan to clean individual burner covers or other removable parts separately.
With these supplies and tools gathered, you’re now ready to move on to Step 3: Removing Excess Debris from the Grill!
Step 3: Removing Excess Debris from the Grill
A dirty grill is not only unappetizing but can also affect the taste and quality of your food. That’s why it’s crucial to remove any excess debris before diving into a thorough cleaning. This step may seem simple, but it lays the foundation for a sparkling clean grill.
To start, give your grill a quick once-over with a wire brush or scraper to loosen any stubborn grime. Be sure to focus on areas where grease and food residue tend to accumulate, such as the grates and burner covers.
Next, use a vacuum cleaner or shop vac to suck up loose debris like ash and crumbs from within the grill. This will ensure that no stray particles interfere with future cleaning steps.
For hard-to-reach areas like crevices and corners, enlist the help of toothpicks or small brushes specifically designed for grill cleaning. These tools can effectively dislodge trapped dirt while preventing damage to delicate parts of your grill.
Remember not to overlook the drip tray or grease trap! These components are notorious for collecting gunk over time. Remove them carefully and dispose of any accumulated debris in order to maintain optimum cleanliness.
By taking these extra few minutes at this stage, you’re setting yourself up for success when it comes to deep-cleaning your BBQ grill later on. So roll up those sleeves and get ready – we’re just getting started!
Step 4: Soaking Grates in Hot Water and Soap
Now that you’ve removed most of the debris from your grill, it’s time to give those grates a nice, deep clean. This step is crucial for getting rid of any grease or stubborn residue that may have accumulated over time.
First, fill a large container with hot water and add some dish soap. The hot water will help to break down any stuck-on grime while the soap will help cut through grease. Make sure the container is big enough to fully submerge your grates.
Next, carefully place the grates into the soapy water and let them soak for about 15-30 minutes. This soaking process will loosen up any remaining gunk and make it easier to scrub away later on.
While your grates are soaking, take this opportunity to clean other removable parts of your grill such as burner covers or flavorizer bars. Simply follow the same steps of soaking them in hot soapy water before giving them a gentle scrub.
After the designated time has passed, remove the grates from the soapy water and give them a thorough rinse with clean water. Use a sponge or cloth to wipe away any leftover soap residue.
Congratulations! Your BBQ grill is now one step closer to sparkling cleanliness. Let’s move on to step 5 where we’ll tackle those grates with a wire brush for an even deeper cleaning experience!
BBQ Grill
Step 5: Scrubbing Grates with a Wire Brush
Now that you’ve soaked the grates and let them sit for a while, it’s time to tackle the tough grease and food particles. This is where a wire brush comes in handy!
Grab your trusty wire brush and start scrubbing away at the grates. The bristles will help loosen any stuck-on residue, making it easier to remove later on. Make sure to scrub both sides of the grates thoroughly for an all-around clean finish.
As you scrub, you might notice some stubborn spots that won’t budge easily. Don’t worry – just apply a bit more pressure or use small circular motions to really get into those tricky areas. Keep going until all traces of grease and debris are gone.
Remember to be gentle yet firm with your strokes, taking care not to damage the grates or scrape off any protective coating they may have. A wire brush is designed specifically for grill cleaning, so it should do its job effectively without causing any harm.
Once you’re satisfied with your scrubbing efforts, rinse off the grates with water again to remove any remaining soap residue or loose debris from brushing. Pat them dry using paper towels or allow them to air-dry before placing them back onto your grill.
Congratulations! You’re one step closer to having a sparkling clean BBQ grill that’s ready for delicious cookouts all summer long!
Step 6: Cleaning the Exterior of the Grill
Now that you’ve tackled the inside of your grill, it’s time to give some attention to the outside. After all, a sparkling clean exterior will enhance not only the look but also extend the life of your BBQ grill.
Start by removing any loose debris or grease from the surface with a stiff brush or scraper. Be sure to pay extra attention to areas where grease tends to accumulate, such as around knobs and handles.
Next, mix a solution of warm water and mild dish soap in a bucket. Using a sponge or cloth soaked in this solution, gently scrub away any stains or built-up grime on the exterior surfaces. Take care not to scrub too hard, as this could damage any painted or coated surfaces.
For stubborn stains that won’t budge with soap and water alone, you can try using a specialized barbecue cleaner specifically designed for grills. Follow the instructions on the product carefully and ensure proper ventilation when using these cleaners.
After cleaning, rinse off any soapy residue with clean water and wipe dry with a soft cloth. This will help prevent streaks or spots from forming on your grill’s surface.
Remember that regular maintenance is key to keeping your BBQ grill looking its best. By following these simple steps for cleaning both the interior and exterior of your grill regularly throughout barbecue season, you’ll be able to enjoy delicious meals while impressing friends and family alike!
Step 7: Cleaning the Drip Pans and Grease Trays
Now that you have tackled the grates and exterior of your BBQ grill, it’s time to give some attention to the often overlooked drip pans and grease trays. These components are essential for catching drippings and preventing flare-ups during cooking, but they can quickly become caked with grease and debris.
To clean the drip pans and grease trays, start by removing them from the grill. Depending on your model, this may involve lifting or sliding them out. Once removed, scrape off any excess buildup using a spatula or scraper.
Next, fill a sink or basin with warm soapy water. Submerge the drip pans and grease trays in the water, allowing them to soak for several minutes. This will help to loosen any stubborn residue.
After soaking, use a sponge or cloth to scrub away any remaining grease or grime from the surfaces of these components. Be sure to pay special attention to corners and crevices where buildup tends to accumulate.
Once cleaned, rinse thoroughly with water until all soap residue is gone. Allow the drip pans and grease trays to air dry completely before reinstalling them back into your BBQ grill.
By regularly cleaning your grill’s drip pans and grease trays in addition to other parts like grates and exterior surfaces, you’ll not only ensure optimal performance but also extend its lifespan. Plus, maintaining cleanliness will prevent unpleasant odors caused by old greasy residues!
Step 8: Cleaning the Drip Pan and Grease Tray
One often overlooked but crucial step in cleaning your BBQ grill is tackling the drip pan and grease tray. Over time, these can become caked with grease, food remnants, and other debris that can impact both the taste of your food and the overall performance of your grill.
To clean the drip pan and grease tray, start by removing them from the grill. Dispose of any excess grease or solid residue into a trash bag. Next, use warm soapy water and a sponge to scrub away any remaining buildup. For stubborn stains or hardened grime, you may need to use a brush or scraper.
Once cleaned, rinse thoroughly with water to remove all soap residue. Allow them to dry completely before placing them back into the grill.
Regularly cleaning these areas will not only enhance the flavor of your grilled dishes but also prevent flare-ups caused by excessive grease buildup. So don’t forget this important step in maintaining a sparkling clean BBQ grill!
Step 9: Cleaning the Drip Trays
Cleaning the drip trays is an essential step in achieving a sparkling clean BBQ grill. These trays are designed to catch drippings and prevent them from causing flare-ups or creating a mess. Over time, these trays can become filled with grease, food particles, and other debris.
To begin cleaning the drip trays, remove them from the grill carefully. It’s important to handle them with caution as they may be hot or contain liquid residue. Empty any liquid contents into a safe container and dispose of it properly.
Next, use a scraper or spatula to scrape off any solid debris stuck to the tray’s surface. Be thorough but gentle to avoid damaging the tray. Once most of the solid residue has been removed, wash the tray with warm soapy water using a sponge or cloth.
After washing, rinse thoroughly with clean water and allow it to air dry completely before placing it back into your grill. Regularly cleaning your drip trays will not only keep your grill looking pristine but also help maintain its performance by preventing grease buildup that could lead to fire hazards.
Remember that proper maintenance is key to extending the lifespan of your BBQ grill and ensuring safe cooking experiences for years to come!
Step 10: Maintaining Your Clean Grill
Congratulations on successfully cleaning your BBQ grill! Now, it’s important to maintain its cleanliness so that you can enjoy many more delicious meals in the future. Here are a few tips for keeping your grill sparkling clean:
- Brush the grates after every use: After each grilling session, take a few minutes to brush off any remaining food particles or debris from the grates using a wire brush. This will prevent them from building up and becoming harder to remove later.
- Clean the exterior regularly: Wipe down the exterior of your grill with warm, soapy water and a soft cloth or sponge as needed. This will help keep it looking shiny and new.
- Cover it up: Invest in a good quality grill cover to protect your BBQ from dirt, dust, and other elements when not in use. A cover will also prevent rusting and extend the life of your grill.
- Deep clean periodically: While regular maintenance is key, it’s also important to give your grill a deep clean at least once or twice per year. Follow steps 1-9 outlined above for a thorough cleaning that will keep your BBQ in top condition.
By following these simple steps for maintaining cleanliness, you can ensure that every cooking experience on your BBQ grill is enjoyable and hygienic.
Remember, if you ever need professional assistance with cleaning tasks around your home, including BBQ Cleaning Services Dirt2Tidy is here to help!
So go ahead, fire up that grill with confidence knowing that it’s clean and ready to create mouthwatering dishes for all those backyard gatherings with friends and family!
Happy grilling!